Showing posts with label rice. Show all posts

October 25, 2012

Baingan Bartha, Bounty, & Food Stamps

Forgive me readers, for I have sinned.  I went an entire month without dumpstering.  How is this possible?!  I'm pretty upset about it.  Still, I think I have some decently good excuses why I haven't been as active in the trash lately:

I moved a few months ago and haven't found good dumpsters close to my new house. I was going to the dumpsters near my work...until I left that job in August (explaining why I didn't dumpster at all in August). 2: Leaving my job allowed for me to get food stamps again (I need the money for non-dumpster-able items like olive oil, etc, I just also started using it for everything else too)...now, I know this makes me a lazy dumpster diver and probably shows you that a big motivation for my dumpstering is saving money as opposed to saving the planet. Still, that motivation is there.
Bottom line is this: I have decent excuses for not dumpstering a whole lot lately. I have some friends who are showing me some new spots, soon, though...so hopefully I'll resume my normal dumpstering routine in no time. Since I got food stamps, I've been taking the leftover amount of funds I have in the account and have been buying dry or canned goods and have been donating them to a food shelter so they don't go to waste (shh, don't tell)! I think a good idea might be to start dumpstering again so that the amount of food I can donate increases (I've also been cooking for starving artist friends a lot lately, so that sort of counts as donating food to a worthy cause too).

July Bounty (really out of date, I know, but:)

7/24/12 – Food Lion

-       Bag of broccoli
-       2 pkgs cherry tomatoes
-       1 red bell pepper
-       1 loaf honey wheat bread
-       2 pkgs kiwis

7/26/12

Tried a new Trader Joe’s during the day – nothing good this time.

7/29/12

Chamomile tea, morrocan mint tea left in a "free" box by co-workers.

 BAINGAN BARTHA


I had gotten really tired of making my usual eggplant dishes: eggplant parmesan, ratatouille, baba ganoush...and then I dumpstered another eggplant.  So, I tried going WAY outside my comfort zone to try an Indian dish out.  I'm really unfamiliar with Indian cooking, so the picture looks pretty gross below.  However, it still tasted pretty good, even if it was a little off from the baingan bartha I'm used to having at restaurants.  Hopefully this is my first and worst foray into the land of Indian cuisine, and that practice will be on my side with this one.

Ingredients:
-  A few cups of brown cooked rice to put the mixture over (pasta will suffice, but will be weirder)
- 1 small onion, chopped
- 1 tomato, chopped
- 1-4 jalapenos (depending on how you like your spiciness), chopped & seeded
- 3-4 chopped garlic cloves, minced
- 1-2 inches chopped ginger
- Olive oil
- Yellow curry powder - optional
- Coriander to taste

Step one: roast your eggplant.  Here's a nice video with instructions here.
Step two: take the pulp and put it in a saucepan with about a tbsp of olive oil.  Add the onions until they're soft, then the jalapenos, garlic, and ginger, then tomato.  Keep at a medium or medium-low heat until you start to smell the aromas mixing together.
Step three:  Add salt, coriander, and curry to taste.
Step four:  Taste and adjust flavors until it tastes right, then serve!

Ingredients not dumpstered or donated: Spices, olive oil

June 5, 2012

Tofu Stir-Fry

Surprisingly enough, I made this 4 or 5 times before I was able to nab a picture of it. Why? Probably because I eat it so quickly.

So, the cool thing about stir fries is that they are really easy to make and you can use basically any protein (I dumpster tofu most often) and any vegetables that you have on hand or froze.  It's especially good for mixing frozen veggies with fresh, since it hides the freezer taste that sometimes accompanies veggies that have been in the freezer a little too long. It's a dumpster diver's paradise.  The stir fry below features marinated tofu, previously frozen green beans, orange bell pepper, corn, zucchini, and red onion.


TOFU (or meat) MARINADE

<u>Ingredients:</u>
- 1 block extra-firm tofu - best when previously frozen, thawed, and then pressed to get out all the liquid with paper towels (I'll cut it up first and then squeeze it to get out even more moisture before marinating it)
- 4 Tbsp soy sauce
- 2 Tbsp Mirin (find it in the Asian section of your supermarket - it's pretty much a dumpster chupacabra.  Don't hold your breath for this ingredient)
- 2 Tbsp Rice vinegar (same as the mirin)
- 1 Tbsp honey (vegans can use agave nectar or some other sweetener)
- 2 Tbsp grated ginger
- 2 tsp toasted sesame oil (I've dumpstered this once)
- 4 cloves garlic
- 1/2 cup onion, chopped
- 1 tsp sririacha sauce (or other hot chili sauce you have - more or less depending on how spicy you want it)

- Scallions (optional)

Thoroughly mix all these ingredients, then fold the tofu into it so it's liberally covered with everything.  Let it sit for a minimum of 20 minutes (time to cut your veggies) or overnight in the fridge.

ACTUAL STIR-FRY

<u>Ingredients:</u>
- 2 tbsp canola, safflower, or vegetable oil (I like using veggie oil the best)
- VEGGIES

Put oil in a pan or wok.
Get your pan or wok super-hot.
Put in your marinated tofu - you want a browning sear on the outside, but you don't want it to burn.  Stir fry for about 2 minutes, making sure each side gets browned (otherwise the tofu is in danger of falling apart).  Then, push it up to the side of the wok (if you're using a pan, just shift it to the outside edge). 
Add your veggies in the order of which take the longest to cook (carrots, mushrooms, peppers, bok choy stems, etc.) to whichever take the shortest (frozen pre-cooked veggies, corn, bok choy leaves, etc.). 
Once they cook up a bit, add the remainder of your marinade for extra flavor.  Keep cooking until the veggies are cooked, but still have a bit of crunch (taste testing is a great way to tell if they're ready).

You can eat a stir-fry straight (I do this), or make it last a little longer by putting it over rice or pasta.  It's a large initial investment of buying ingredients from the grocery store, but once you buy those basics (which are all pretty cheap), they last you MANY, MANY more meals, so it's worth it.

Items not dumpstered or donated: Ginger, garlic, sesame oil, mirin, rice vinegar, vegetable oil

October 28, 2011

Broccoli Cheddar Bake


So, I've always had this idea in my head from childhood that broccoli and cheddar cheese taste good together. Yet, I usually just steam broccoli, throw some butter and salt on it and call it a day (which is essentially the first step of this recipe, so if you want to do that, you can).

I'm usually very anti-anything-remotely-resembling-casserole since it reminds me of '50s housewives (gross) and overly processed leftovers (double gross). Still, I decided to try my own rendition of one, which turned out pretty tasty. It's not as healthy as I'd like, but I think it's definitely better than the very (surprisingly) popular cheese-whiz/onion powder/frozen broccoli versions I found online. It was kind of an experiment, but for a pretty minimal amount of effort I came out with enough food to last me for a week's worth of lunches. Plus, I was right - broccoli and cheddar do taste great together.

BROCCOLI CHEDDAR BAKE

Ingredients:

- 3 heads of broccoli, cut into small florets (use the stem too) (you can use previously dumpstered and frozen broccoli too, but it may not taste as good as the fresh stuff)
- 1 small white onion, diced
- 2 long stalks celery, chopped
- 2 cloves garlic, minced
- 2 tbsp chopped fresh rosemary and/or thyme (optional)
- 1 cup mayonaise (bonus if home-made)
- 1 cup sour cream
- 2 cups shredded cheddar cheese
- 2 cups uncooked rice
- 1 stick unsalted butter, melted
- 1.5 cups Italian-spiced bread crumbs (extra points if home-made from dumpstered bread) - you can also use crushed up crackers like ritz crackers, which will give it a different but good flavor.
- 1 can or 2 cups leftover cooked chicken (optional - I didn't use this, but it could add some extra protein)
- Salt & pepper to taste

Normally, people use cream cheese or a can of condensed cream of mushroom (or chicken) soup instead of my sour cream/mayo combination, but they were the only ingredients I had on hand and I was hungry.

Preheat your oven to 350 degrees Fahrenheit.

Step One: Steam your broccoli

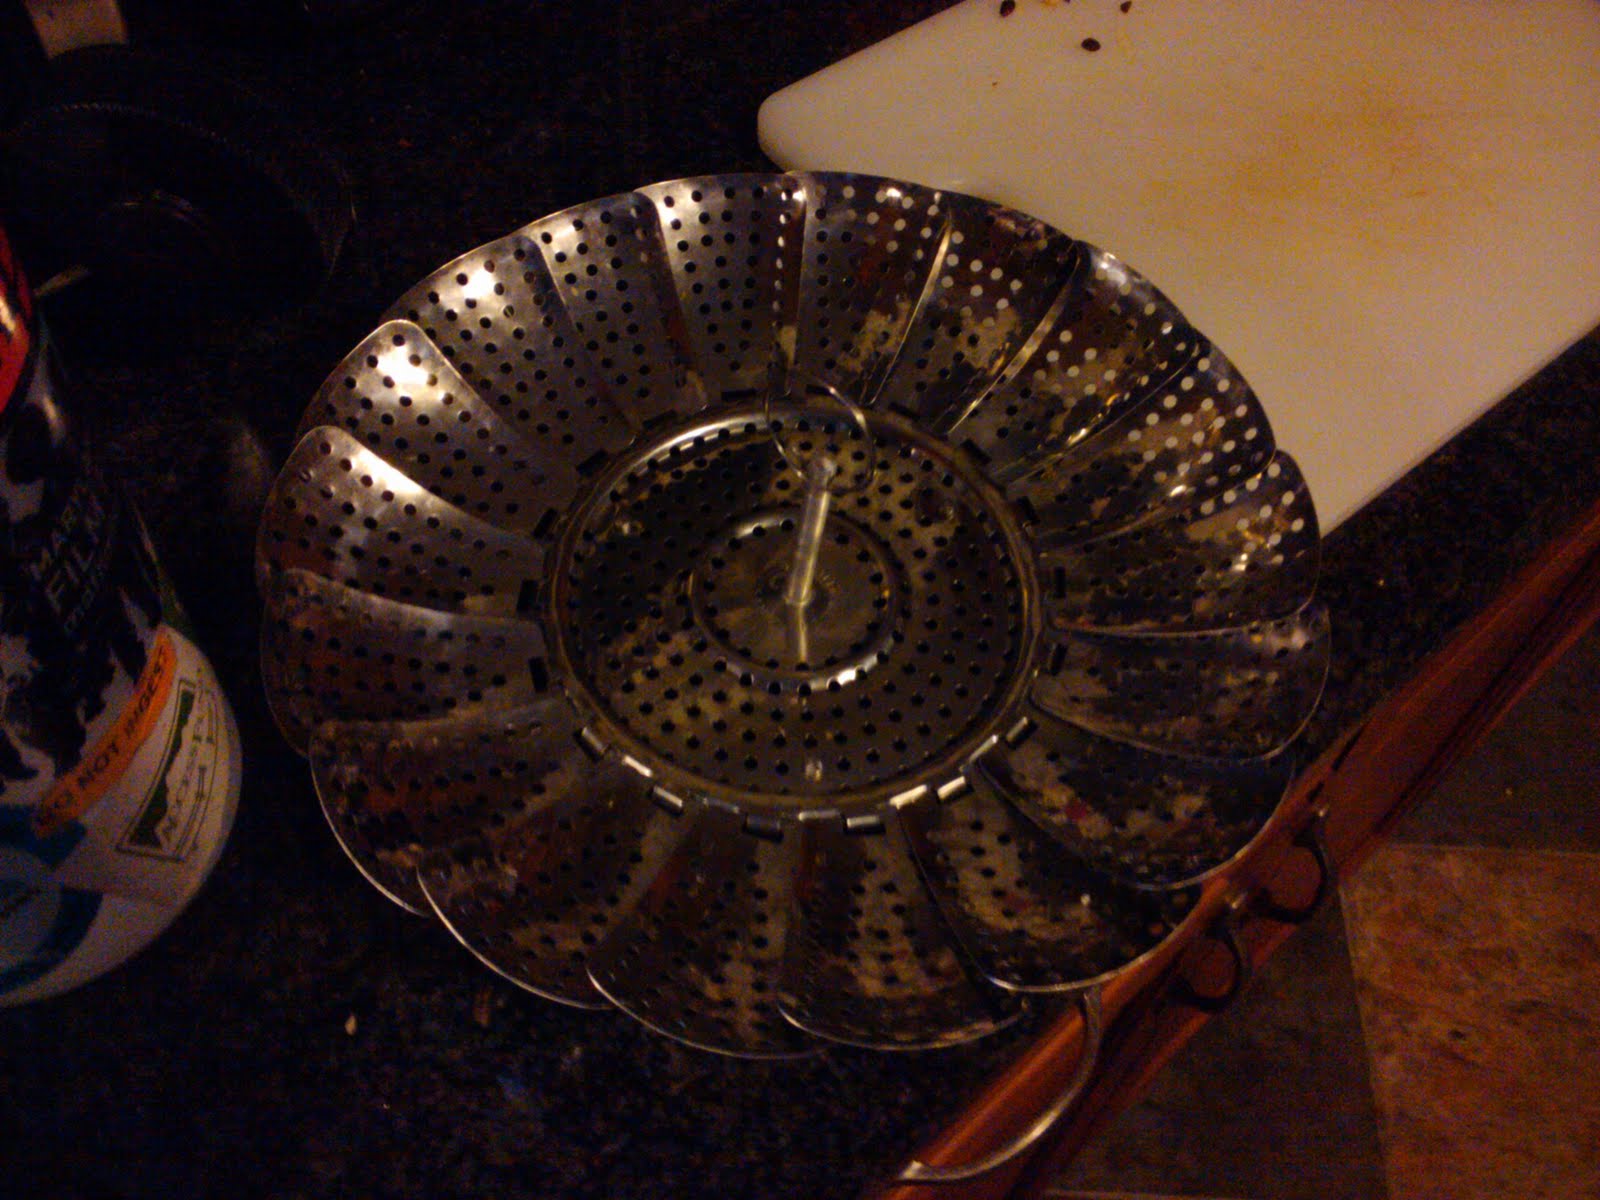
Put a weird thingy that looks like this (called a steamer?) in the bottom of a pot with enough water underneath so it barely shows:
Throw your broccoli on top. Turn the stove to medium-high, then cover the pot (be careful that the water doesn't all evaporate or the bottom of your pot will burn). Steam until broccoli is bright green and a fork goes through pretty easily. If you're lazy, you can just throw your cheddar cheese (or butter with some salt) on top and call it a day. This makes a great side dish by itself.

If you're bold enough to continue into the land of house-wifery, then continue to...

Step Two: Put it all together

While you're waiting for the broccoli to steam, mix the onion, celery, garlic, sour cream, rosemary, and mayonnaise in a bowl.
Once the broccoli is finished, dump it onto the bottom of a glass or pyrex baking pan (9"x12" works well).
Evenly cover it in the sour cream/veggie mixture.
Sprinkle your shredded cheddar over the top.
In a separate bowl, mix your melted butter and bread crumbs into a thicker mixture. Sprinkle this on top as well.

Step Three: Wait and make your rice

Throw it in the oven for 30 minutes while you make some rice (it's pretty easy - just read the side of the bag or box of rice - give yourself about 40-50 minutes for it to turn out well, so maybe start boiling your water around when your broccoli is done steaming so everything is done at the same time).

When it comes out, it'll look kind of like this:
Serve the bake by itself or for some added heartiness, put a few scoops of rice underneath! I used brown rice to make the dish last EVEN LONGER.

Items not donated or dumpstered: Butter, sour cream, mayonnaise, garlic, rosemary (from garden), salt, pepper

June 20, 2011

Shrimp Burrito Taco Thingies & Guacamole

The meal I had the other night was perfect. PERFECT! It was filling and delicious and fresh and (other than the 2 avocados), pretty low on calories if you care about that sort of thing. It was one of those magic moments where you realize all the ingredients you have on hand are exactly what you need to make something awesome happen.


SHRIMP BURRITO TACO THINGIES

I'm just writing down what I made. If you're vegetarian or vegan, things can be substituted or removed and you'll still have a pretty hearty meal at the end of the day.

Ingredients:

- 8 raw shrimp (or protein of some other sort - black beans, black eyed peas, chicken, whatever)
- 1 clove garlic
- Guacamole (see recipe below to make at home)
- 2 tbsp red onion, diced
- 2 tsp green pepper, diced
- 2 tsp red pepper, diced
- 2 tsp mango, diced (previously frozen and thawed)
- 0.5-1 cup shredded sharp cheddar cheese (optional)
- Juice of 0.5 lime
- Lime zest (CRUCIAL)
- 1 tbsp butter (or olive oil)
- 1 cup cooked wild rice (or whatever kind you have on hand - I just love the flavor and texture of wild rice)
- 2 wraps
- Salt, red pepper flakes, pepper, and cilantro to taste

Cook your rice. With about 10 minutes left to go, start cooking everything else.
Marinate raw shrimp for 5 minutes in lime juice with lime zest, salt, pepper, and red pepper flakes.
Melt butter in a pan on medium-high. Throw in your shrimp to cook. At the last moment, throw in 1 clove of minced garlic. While you're waiting for the shrimp to cook, start cutting your other ingredients and make your guacamole.
Once the shrimp is done, cut it up and put it aside.
Clean your pan or get a new one. Put one of your wraps in it on medium-low heat.
Shred as much cheddar as you want on the bottom of it and spread a liberal amount of guacamole next to it. Add your shrimp (so it stays warm). Sprinkle the other ingredients and fresh cilantro on top and cook until the cheese is melted (maybe 2 minutes or less).
Remove from the burner and make a second burrito taco thingy.
Wrap it up and enjoy!
You can now add hot sauce, sour cream, or whatever else you might want. I personally love how fresh all the ingredients were in this, so I didn't want to sully them with any extra nonsense.

After I was finished, I had extra guacamole left over. Luckily, I still had some tortilla chips from a BBQ at my house a month or two ago, so I polished off the rest of the guac in no time! Honestly, I would have eaten it straight, though...

GUACAMOLE

This is the simplest guacamole I know how to make. You can always jazz it up with cilantro, tomatoes, lime juice instead of lemon, jalapeno, and other spicy stuff. You can blend cheese into it...the options are limitless. This is my Mom's really easy recipe that always tastes awesome and takes about 1 minute total to make.

Ingredients:

- 2 ripe avocados (if you get them the day before you eat them, put them in a sealed brown paper bag overnight and they'll ripen faster).
- 2 tsp lemon juice (some acid is necessary if you plan on keeping it more than 1 day - the acid is what keeps it from going brown)
- 2 cloves of garlic, minced
- Salt to taste

Quarter the avocados and put them in a bowl. Mash up with a fork (you can also use a food processor for this part, but it takes more time during cooking and clean-up, so I forgo it).
Mix in minced garlic and lemon juice.
Mix in salt to taste. Beware - if you're using the guacamole with chips, most tortilla chips are already super salty and can ruin the guacamole experience if you've over-salted it. This needs to be synergy in your mouth.
DONE.

This makes a great snack or pot luck item OR YOU CAN SPREAD IT ON ANYTHING (sandwiches, burritos, bagels, pizza...it's pretty easy to get creative with it).

Items not dumpstered or donated: Butter, bell peppers (from my garden), cilantro (from my garden), rice, garlic, shrimp

June 14, 2011

Stuffed Green Peppers


I dumpster bell peppers a lot. The red, orange, and yellow peppers are all a little more flavorful, so you can use them to spice up a dish. Green bell peppers, on the other hand, are a little more bland, so you need to get creative in using them.

This is a very hearty meal that you can tweak depending on what you have in your pantry.

STUFFED GREEN PEPPERS

Ingredients:
- Bell peppers
- Rice (optional)
- 1 can of black or kidney Beans (or a few handfuls if they're dry)
- Cheese (a taco/TexMex blend or sharp cheddar works best)
- Sriracha Sauce
- Salt & Pepper to taste
- Whatever extra veggies you want

If you're using rice in your stuffed peppers, start by cooking your rice (this will take the longest). Some companies make rice and beans combos that are already spiced and take a little less cooking time than traditional rice.

If you're starting with dry beans, remember to soak them!

Cut your green peppers in half - remove the tops and seeds.
Place them on a tin foil covered tray.
Fill the peppers with your cooked rice and beans. At this juncture, you can also put other roasting veggies into the mix for added flavor, along with salt & pepper.
Sprinkle shredded cheese on top.
Put in the oven at 375-400 degrees until the cheese melts and the peppers roast up a bit.
Squeeze sriracha sauce on top for extra spice!

In my rendition pictured above, I left out the rice because I was in a hurry.

Items not dumpstered or donated: Cheese, black beans (from the (sadly) now-defunct Beet Food Co-op)