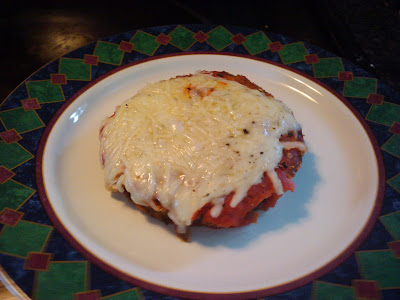
This recipe was made for me on a first date in college. We helped make it together, assembly-line style, which was a cool, interactive way to get to know each other. The guy was a vegetarian and totally won me over (with the recipe). The eggplant was perfectly cooked - not mushy or gross at all like it can be if cooked poorly. Although things didn't work out romantically between the vegetarian and I, we're still buds and I still make his Eggplant Parmesan at least once a month. I have since dated many more culinary vegetarians.
Ingredients:- 1 large eggplant (the vegetarian told me it's better if the eggplant is uniform in shape because then the medallions cook more evenly. I've experimented with lots of different sizes and it doesn't seem to make a difference to me as long as the slices are the same height).
- 1-2 eggs (depends on size of eggplant)
- Enough flour to cover a plate (about 1 cup, maybe a little more)
- Enough Italian bread crumbs to cover a plate (about 1 cup) - bonus points for homemade dumpster bread crumbs (recipe forthcoming)
- 3/4 jar of tomato sauce (extra bonus points if it's homemade and canned from dumpstered materials)
- 2 cups of shredded skim milk mozzarella cheese
- 1.5 cups of shredded Parmesan cheese
- 2 tbsp olive oil
- Basil, oregano, salt, & pepper to taste
It's easiest to think about this recipe in terms of chunks of actions, I think...so I'll put them down as such:
CHUNK ONE: PREP
Pour flour & breadcrumbs on two separate plates so they thinly cover the surface.
Take a baking sheet and cover with aluminum foil.
Beat your egg(s) in a bowl.
Slice eggplant into about 1/4-1/2" slices.
Preheat oven to 350 degrees.
Start heating olive oil in a large pan at medium/medium-high heat (but not so high a heat that the oil will burn).
CHUNK TWO: COVERING EGGPLANT WITH YUMMY STUFF/COOKING IN THE PAN
Press your eggplant slices in flour so there's a light dusting on each side.
Next, dip the eggplant medallions into your egg, followed by pressing them into the breadcrumbs so they're evenly covered on both sides.
Once a medallion is covered with all the ingredients, throw it in your olive oil. You want a nice golden brown crisp on each side, and ultimately want a fork to barely go through your eggplant if you stick it in near the edge. That's how you know it's ready for...
CHUNK 3: PUTTING THE EGGPLANT ON YOUR BAKING SHEET
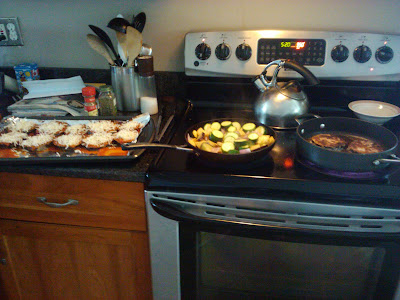
Hopefully you'll have started this next step as your eggplant medallions are cooking in the pan or else things will be really awkward (chunks 2 and 3 overlap if you're being efficient). In the picture below, you can see the eggplants cooking in the pan on the right and a few eggplant medallions ready on the baking sheet on the left, with my tomato sauce already prepped for my medallions to be placed on top of...in the middle is the beginning of my ratatouille - recipe forthcoming).
So, you take a teaspoon of sauce and put it on the baking sheet, using the bottom of the spoon to spread it around in a circle (about as large as your medallion).
Place a medallion on top.
Put another teaspoon of sauce on top of your medallion, along with any extra spices you want to add (I use a pinch of basil, oregano, sea salt, and black pepper).
Sprinkle mozzarella and Parmesan on top.
Repeat with all your medallions.
CHUNK 4: THE OVEN AND EATING
Stick that shit in the oven for about 10 minutes (as long as it takes for the cheese to melt and brown a little on the top).
Take it out and enjoy!
The magic of this dish is that the leftovers are just as amazing days later as when you first took the pan out of the oven. You can use a medallion on a burger bun for lunch at work (highly recommended), eat them as a savory late night snack cold, or you can just reheat them normally and eat some with a salad.
Items not dumpstered or donated: Flour (from the now-defunct Beet Food Co-Op), mozzarella, Parmesan, salt, pepper, egg, basil (from garden), oregano (from garden)


